Thnks Plan Level: Thnks’ Salesforce AppExchange integration is available for organizations on the Enterprise or Enterprise+ plan level. Contact sales@thnks.com for information on how to upgrade.
System Requirements
Below please find more information on the necessary requirements before installing our Salesforce App in your instance of Salesforce.Supported Salesforce Editions
- Professional
- Enterprise
- Unlimited
- Developer
Installation
In this section, we’ll walk through installing the AppExchange application in your Salesforce instance. These instructions are meant to be a high-level overview, please contact your Salesforce Administrator to discuss the process for installation onto your specific instance and to determine whether or not a Sandbox should be used first.Preparing Your Thnks Account for Salesforce
Contact your Thnks Account Manager (or integrations@thnks.com) to enable the Salesforce App connection in your organization’s Thnks account. Thnks offers two ways to connect your users’ Thnks activity to Salesforce:- User Connection - each user must enable their own Thnks <> Salesforce connection via their Thnks account profile.
- Note: if a user does not enable their connection, their Thnks activity will not appear in Salesforce.
- Org Connection - an SF admin can enable a single connection between Thnks and Salesforce. Individual users will not have to perform their own connections.
- Note: For Thnks activity to appear in Salesforce, the email address of the Thnks user must match the email address of their Salesforce account.
Installing from the AppExchange
To install Thnks, you’ll need to navigate to the Thnks App listing in the Salesforce AppExchange. Here is a direct link. Click on “Get It Now”, make sure you’re logged into the correct account, and a dialog box will appear:Choose The Instance
Select the correct Salesforce instance, and decide whether you want to install in Production or in Sandbox, and proceed.
Confirm Details
After confirming details and agreeing to the terms and conditions, click “Confirm and Install” to continue.
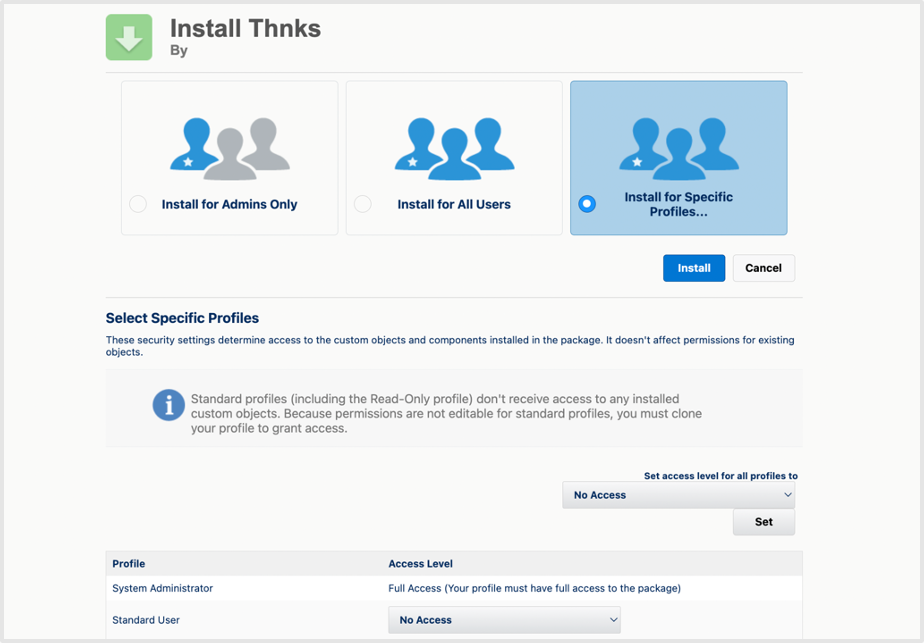
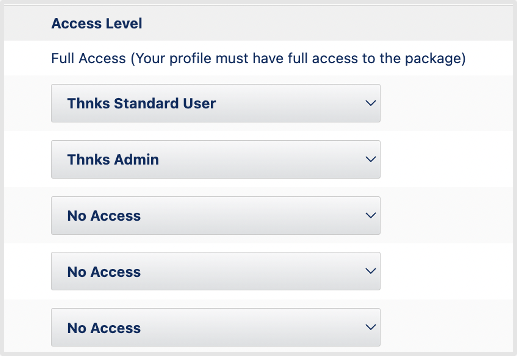
- No Access (Users with this profile will not be able to see any Thnks data)
- Thnks Standard User (Users with this profile will be able to view all Thnks data, but will not be able to configure the Thnks settings)
- Thnks Admin (Users with this profile will be able to view and edit all Thnks data, as well as configure the Thnks settings)
Upgrading to v1.8
Upgrading from v1.3 to v1.8 of the AppExchange Listing
Good News! Upgrading from v1.3 to v1.8 is seamless with no breaking changes, new required permissions, or manual data migration needed.
- Navigate to the Thnks AppExchange listing
- Click “Get It Now” and select your Salesforce instance
- Follow the same installation process as a new installation
- The upgrade will preserve all your existing configuration and data
What’s New in v1.8
After upgrading, you’ll have access to these new features: 🎯 Send Thnks from Salesforce- Add the “Send Thnks” Lightning component to your record pages
- Configure your Organization Token (contact integrations@thnks.com)
- Enable users to send Thnks directly from Contact, Account, and Opportunity records
- New object for automated Thnks workflows
- Salesforce Flow integration capabilities
- Configurable approval processes
- Improved field mapping for ROI data
- “Backfill ROI Fields” functionality
- Better reporting capabilities
Post-Upgrade Steps
Configure Organization Token
- Contact your Thnks Account Manager or integrations@thnks.com to obtain your Organization Token
- Navigate to Manage Thnks Settings → Send Thnks tab
- Enter your Organization Token and configure settings
Add Send Thnks Component
- Use Lightning App Builder to add the “Send Thnks” component to your record pages
- Configure component settings as needed
- Test the functionality with your users
Upgrading from v1.1 to v1.8 of the AppExchange Listing
If you have a very old version (v1.1) of the Thnks AppExchange app installed, please follow the same installation process as a new installation using this link. The main considerations to keep in mind when upgrading from v1.1:- The Thnks Status Log object will no longer be syncing records (but the old records will remain)
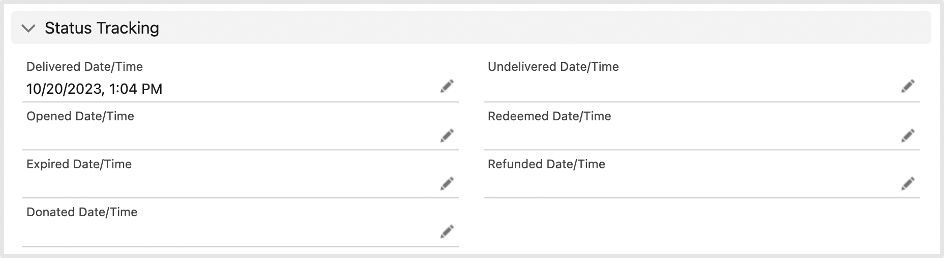
- There will be many new fields on the Thnks object, such as Opportunity and Account lookups, as well as several new date/time fields to replace the need of the Thnks Status Log
- There is now a tab called “Manage Thnks Settings” to configure various settings in the integration (see “Thnks Configuration” section below)
Backfilling Thnks Records in 1.3
If you have upgraded from 1.1 to 1.3, you will now notice that the Thnks Status Log object is no longer being used. Instead, there are new date/time fields to track the status of key events such as “Delivered Date/Time”, “Redeemed Date/Time”, etc. In order to backfill your historical Thnks records from 1.1 with the correct dates for these new fields, you’ll need to have a user with the Thnks admin permissions in Salesforce head to the “Manage Thnks Settings” and click “Enrich Old Thnks”.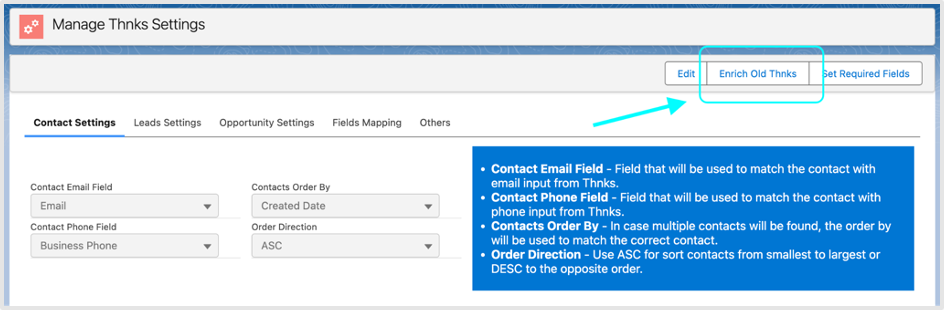
Permissions
Install

Manually Updating Permissions
If after installing the Thnks app following the install instructions above you need to change permissions, the recommended path is by assigning Permission Sets to the appropriate Users. Alternatively, you may also grant permissions to the Thnks objects at the Profile level.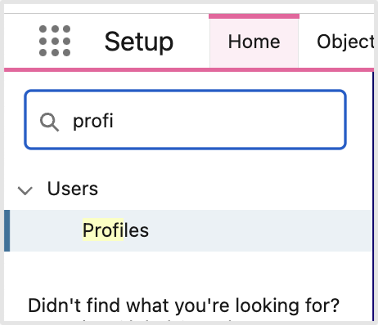


Permission Sets
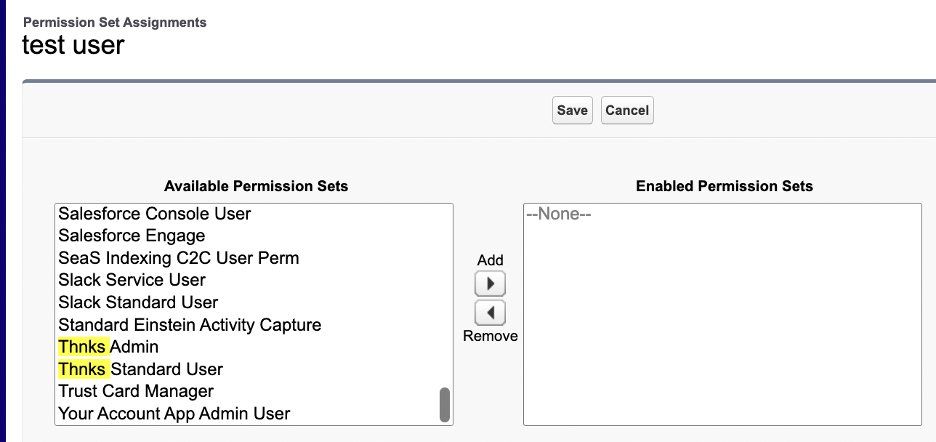
Alternatively, you can assign a Permission Set to individual users. From Setup, click into Users, and then choose any User which you wish to grant additional permissions to. Under “Permission Set Assignments”, click “Edit Assignments”.
- Thnks Admin (grants View/Modify All access to the Thnks object, as well as allowing this User to configure the Thnks settings)
- Thnks Standard User (grants View All access to the Thnks object)
Thnks Configuration
Once you have Thnks installed in your Salesforce environment, you will want to review the integration settings. If you click the App Launcher in Salesforce (this is the 9 dots in the top left), and then type in “Thnks”, the item “Manage Thnks Settings” should appear. Click into that.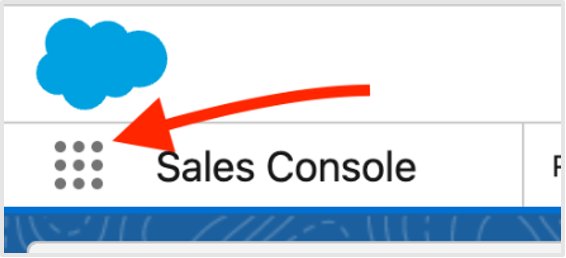

- Contact Settings
- Lead Settings
- Opportunity Settings
- Fields Mapping
- Others
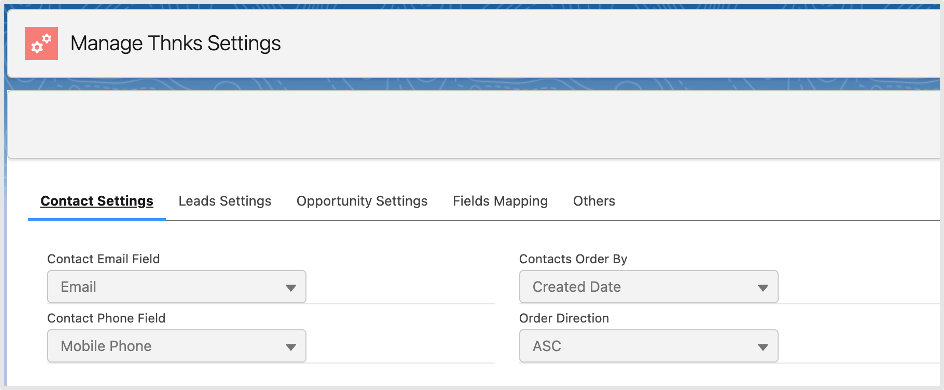
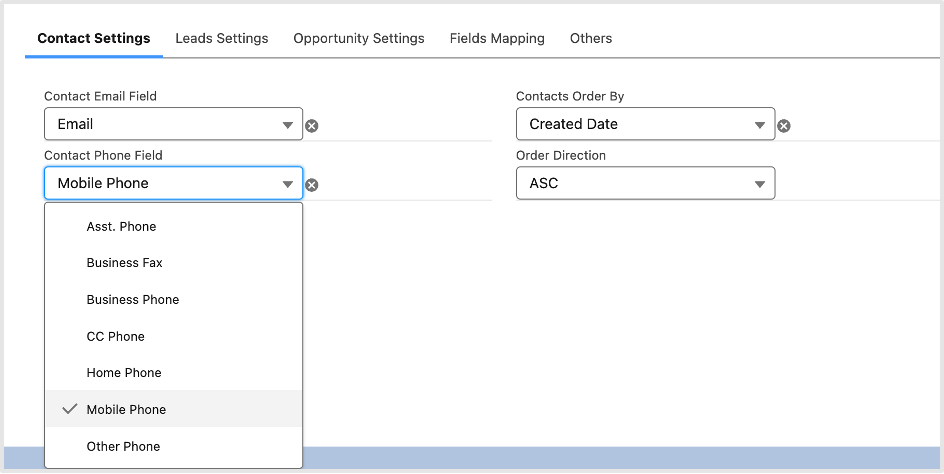
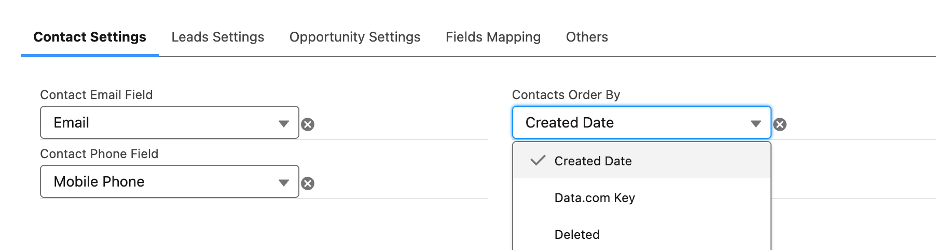
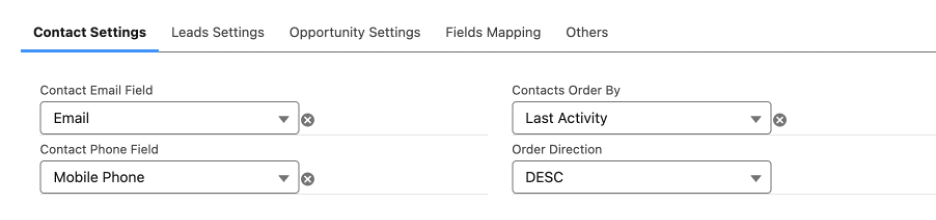
Contact Settings
This tab is where you can customize the logic that Salesforce will use for matching Thnks records with existing Contacts in your Salesforce instance. Since Thnks are sent either using email or SMS, this means that there will be two different fields to match against: an email address or a phone number. By default, the email field being used is the standard Email field (API name of “Email”), and the phone field being used is the standard Phone field (API name of “Phone”). However, you can change these so that Thnks matches Contacts based on any other field that is of type Email or Phone, respectively.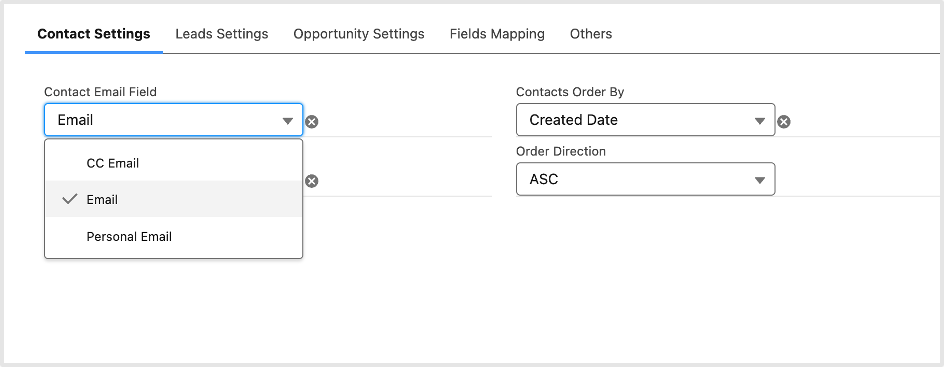
Lead Settings
The concept of configuring the Lead matching is exactly the same as the Contact. Please see the above section on Contact Settings, and you can customize different logic for the Lead. Again, you can only use Email and Phone type fields for the matching logic. The matching logic you use for the Contact has no impact on the matching logic for the Lead, and vice versa.Opportunity Settings
The Opportunity matching is even more simple. There are two things you can configure:- Whether or not you wish to match Opportunities
- Similar to Leads and Contacts, how to decide which Opportunity you wish to match in the scenario that there is more than one matched Opportunity
- A Contact is matched to the Thnks record
- That Contact is associated with
- The Opportunity is open
Fields Mapping
The Fields Mapping tab enables you to map custom properties from within the Thnks app onto the Thnks object in Salesforce. These are custom, required fields that you can prompt users to enter when sending a Thnks. The below is just an example, as these field names will be unique to your Thnks account.
Others
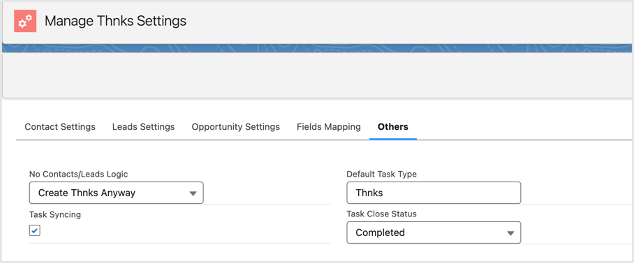
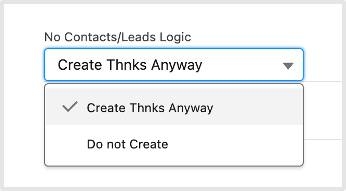
- How to handle Thnks when no Lead or Contact match is found
- Syncing Thnks as Activities (Tasks)
- Create Thnks (with no matching Lead or Contact)
- Do not create a Thnks
- First, the Task Syncing field is a simple toggle of whether or not Tasks should be created. If this is checked, a Task will be created and it will be associated with both the Thnks record and a Contact. If the Thnks is associated with a Lead, then only the Thnks record will be associated (Tasks cannot be associated with a Lead and another object). More on the Task fields being set below.
- The Default Task Type field allows you to specify what Type value should be populated on automatically created Tasks.
- The Task Close Status field allows you to specify the status Tasks should be set to when the corresponding Thnks activity is considered complete.
Send Thnks
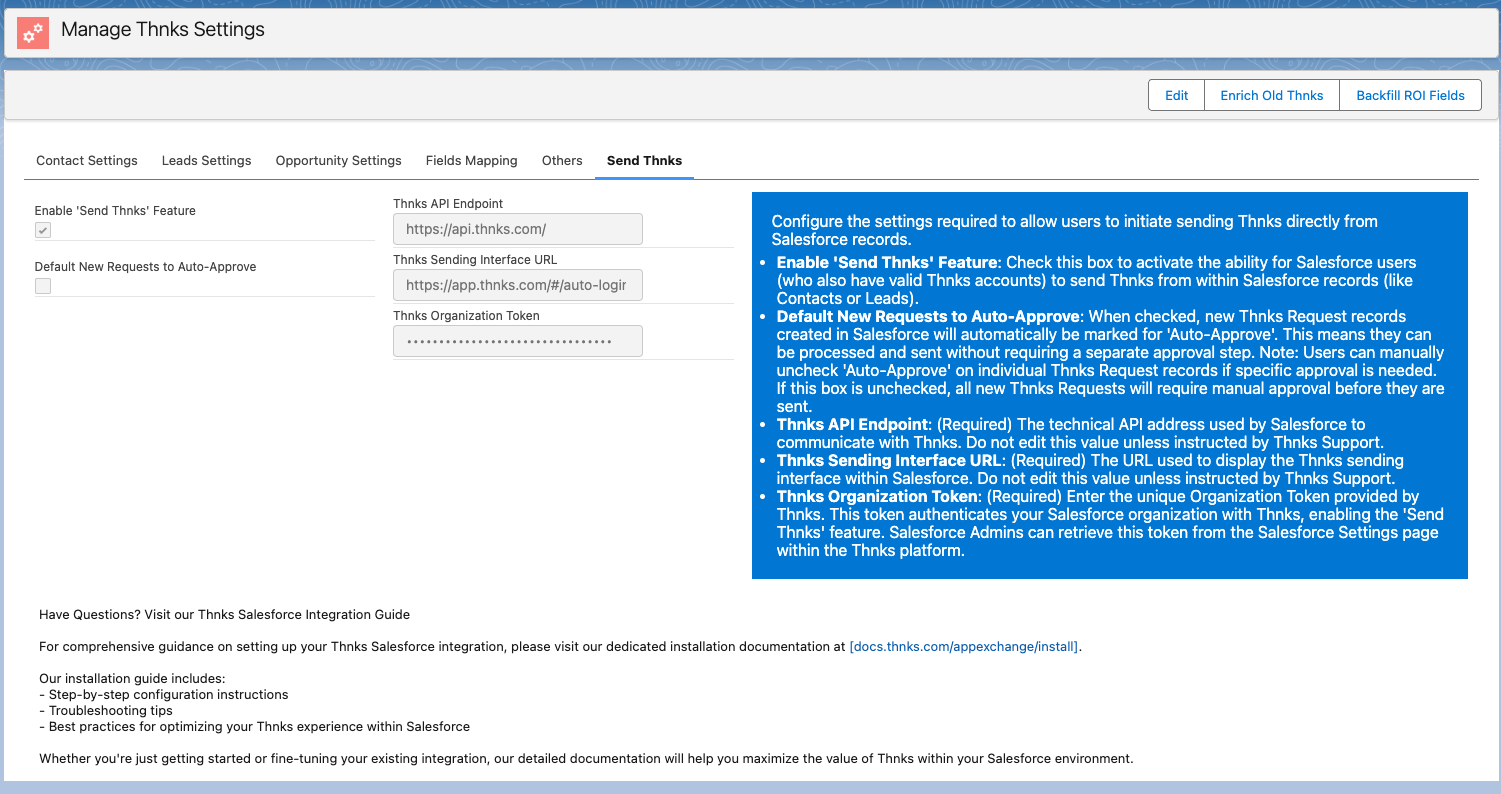
- Default:
https://api.thnks.com/
- Default:
https://app.thnks.com/#/auto-login
Adding Send Thnks Component to Lightning Pages
To enable the “Send a Thnks” button on your Salesforce records:Navigate to Lightning App Builder
- Go to Setup → Object Manager
- Select the object where you want to add the component (Contact, Account, or Opportunity)
- Navigate to Lightning Record Pages
- Select the page layout you want to edit
Add the Send Thnks Component
- In the Lightning App Builder, look for the “Send Thnks” component in the component palette
- Drag and drop it to your desired location on the page
- Configure any component-specific settings
- Click Save
User Requirements for Send Thnks Feature
For users to successfully send Thnks from within Salesforce:- Matching Email Addresses: The user’s Salesforce email address must match their Thnks account email address
- Active Thnks Account: Users must have an active Thnks account
- Proper Permissions: Users must have the “Thnks Standard User” or “Thnks Admin” permission set assigned
- Organization Token: The Organization Token must be properly configured in the Send Thnks settings